Hey everyone! Welcome to Theorycrafting: Cosplay Edition! This series will be updated weekly and features a discussion on potential ideas for the creation of a character for cosplay. This is a fairly quick look into what I might think of doing and what materials I may use when considering building a character.
If you have any requests of characters you would like to see, feel free to let me know who in the comments, on my facebook page, or via Twitter!
This week’s character is: Ahri (Foxfire Skin, League of Legends)
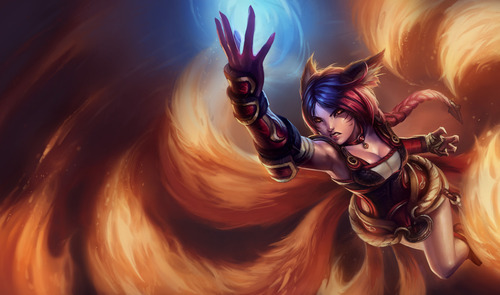
Ahri is a very sexy, provocative League of Legends Champion. Her classic skin has become quite popular in the League of Legends cosplay scene. Her design is beautifully delicate, yet extremely lithe. These qualities in her visual design also translate to her game play as she is very hard to pin down. The instant this Foxfire skin came out (3D Model), I fell in love with it!
I should let you know that the ideas I have for this costume are prohibitively expensive 🙁 , but I really wanted to talk about how I would ideally go about engineering this costume and what materials I would use. In particular, I have some exciting ideas for how I would go about getting the fire effect for the tails. ^_^ These methods will also not yield a very mobile costume for the wearer, so a handler/helper is pretty much necessary, but I think it would be awesome and worth it!
I think I would pay attention to making the costume “pop” through 3D detailing and effects. I really want to make it seem like the fire could come alive at any moment.
Main Body:
My go-to material for the main body portion of the costume would be black, textured cow hide leather. Yes, I know, it sounds kinda kinky, but I think the look, feel, and texture of leather (not the fake stuff) would work really well for this costume. I think the stiffness of leather would also help this costume retain its shape and overall look. Additionally, for practical and modesty reasons, I would also make the black leather portion into something resembling a leotard with open portions on the sides. For the less visible portions of the leotard, I would use some other kind of soft, durable fabric to avoid chaffing.
For the red edges and seams of the main torso, I would use piping to give a bit of a nice 3D texture.
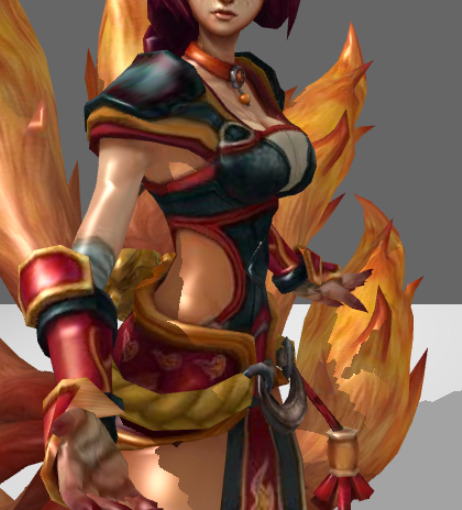
The red and yellow portions on the shoulder would be made from silk fabrics and may have some batting inserted to give some padding and dimension. I would use circular brass/gold colored buckles on both the front and back, which would also allow for some adjustment. Additionally, after sewing the leather onto the silk portions of the shoulders, I would probably go back over the stitching with either red embroidery thread or satin ribbon for cosmetic red stitching. Here is a better picture of what I am talking about:
Luckily for the bust area, it appears that it is not just an open space! There does appear to be some white, probably sheer fabric there, topped with red cording. I don’t think that I would choose a stark white fabric, though, as I think it would be a bit too jarring for the color scheme. I would probably try for an off-white/ivory color so that it still retains a golden tint.
For the skirt, I would use an Indian silk paisley brocade. The metallic threads will work really well for the overall look. For the braid, I would sew yellow silk piping tubes and then braid them so that the braid has some dimension.
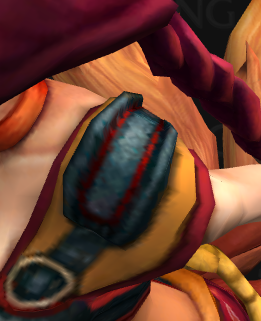
For the hanging groin covering, I would use a base low shine black satin or interfaced black silk. The red would, again, be silk. For the single flame design, I think I would carefully cut out one of the paisly designs (or two and mesh them together for a flame shape) from the brocade and stitch it into place, as it will stay consistent with the rest of the pattern. To prevent fraying on the edges of the brocade cut out, you can use Elmers glue or clear nail polish.
Armor:
For the bracers, I would probably go for wonderflex as a base with a red and yellow silk fabric covering. I think for the yellow flame designs I would use friendly plastic, much in the same way I used it for Orianna. I would probably consider sculpting the friendly plastic over the red fabric and then melting it in place, then painting the swirls with metallic gold acrylic paint.
One important note for friendly plastic is to moisten your fingers as you sculpt it. The water helps to maintain a smooth surface and prevents your fingers from sticking. As friendly plastic cools, it is easy for even fingerprints to create wrinkles on the surface, hence the water.
For the black portions of the bracers, I would probably integrate the same leather as on the torso for the 3D effect and texture.
The bracers will have a seam with this method, but I think I would add some elements of my own at this point for fasteners. I would close the seam with black leather lacing or gold cording. Also another note: there are gauze wrappings on Ahri’s arms under the bracers up to her elbows.
For the shin guards, I would do something similar to the leather bracer I made for Sejuani. I would take one layer of wonderflex, and shape it to the correct form. I would then sandwich it and sew it in between two layers of black leather (again, same kind as the torso area). I would then add in red piping on the edges/seams and the fasteners over that.
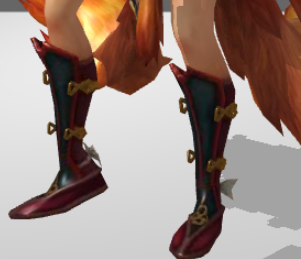
You may be asking, wouldn’t be leather be stiff enough on its own or couldn’t you boil it? It may work on its own, but I think that the desired shape needs some extra support, and it would feel a bit more like solid armor with the wonderflex inside.
Odds and Ends:
I would use a wine red long wig for this project and then style it the way I need it.
For the ears, I would try to have a headband with the ears on it under the wig and then tease them through the wig cap between the wefts. I think I would also go for a more coppery or natural fox colored faux fur as well, as I think it would look a lot more natural than a jarring bright orange.
I would most definitely spring for golden colored contacts!
And Finally, the TAILS!
Ok, so, I have an idea for engineering the tails so that they can be suspended a bit away from the body. Before we tackle the actual tails, though, let’s look at the base.
Tail Base
1. Fit a piece of plywood from about the base of your tail bone to the outtermost curve of your butt, keeping the width a bit less than that of your hips.
2. The plywood will then be strapped and attached to you much like a climber’s harness. Here is a rough idea sketch
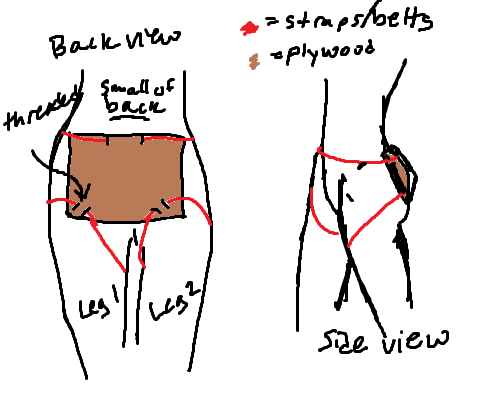
3. You then attach pvc pipe fittings to the plywood as well as rig in some screw on/off fittings so you can detach the tails for transport.
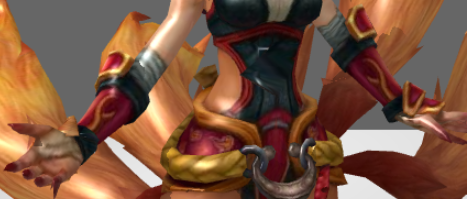
Note: The base plywood/harness would fit over the black leotard, but below the skirt. I would fit black silk or leather over the plywood and have a bit hang down in the back to mask it. I would also include some form of padding on the underside of the straps and plywood to avoid rubs and chaffing.
Tail Frame Construction
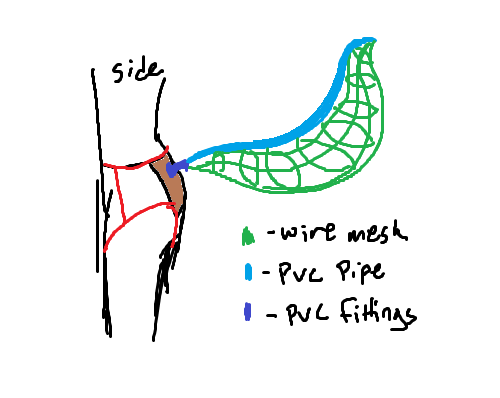
1. 1/2 inch PVC pipe should make a good, sturdy support and can define the overall contour/curve of the tail. With an open flame, you can heat the PVC pipe and bend it. It will harden again once it cools. Just make sure that one end remains untouched so that it will fit into the fittings.
2. Shape the hollow bulk of the tail out of wire mesh, probably 1/4 inch or 1/2 inch hardware cloth or some kind of chicken wire. If you have to cut areas for darts/curves, you can fasten them back together with wire. You may also want some wire on the inside of the tail as support/tension so that the shape doesn’t sag too easily.
4. Lastly, to help support the tails since they will be pretty far away from your body and they may get heavy, create a long fishing line loop at about the midpoint of each tail. The line will eventually be connected to a clip on the back buckle of the shoulder pieces of the leotard, the loops would probably be gathered together and clipped to a small carabiner.
5. Before you start covering the tails, install a high power small fan and battery powered flame themed Christmas lights inside the tail. The lights will provide a glowing effect and the fans will help to move the covering material I have in mind.
Fire Tails!
1. First, sew a sheer fabric cover for each tail. You could use a mixture of patchwork sheer fabrics if you want. This will serve as a base color (to hide the wire) as well as a surface to attach the next material to.
2. Now for covering the tails. This is probably THE MOST expensive part of the costume, especially with my ideal version: I would use lighting filter gels, like they use in lighting for theaters and other stage events. It is a light, translucent, flexible material that is still stiff enough to provide some structure. (Only thing is that it gets expensive)
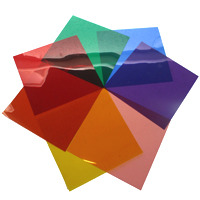
3. Basically, what I would do is cut out fire shapes from the gels and use varying colors of the gels, perhaps add in some translucent enamel color changes/details on the gels. You can also apply a bit of heat to the gels to make them warp into flame shapes
I imagine this process to be similar to feathering a set of wings…and there are nine tails…so it would be time consuming, but I think it will be worth it, especially since the fan would make the gels rub move a bit, creating a bit of a crackling sound!
4. Finally, the skirt will go over everything and act as a cover for the bases of the tails.
With all of this said, do you have any ideas or methods that you would rather employ? Do you have any dream costumes or methods you wish you could try?
Leave your questions and/or comments below! I’d love to hear what everyone else’s thoughts are!
Also, feel free to let me know what you think and if you have any suggestions on how to make this better!