This article has been a long time coming but I’ve finally gotten to writing it! I’m really fond of Zap, and it was the first gun out of three I started work on for Jinx. If you are interested in the construction of the main costume, check out the WIP article!
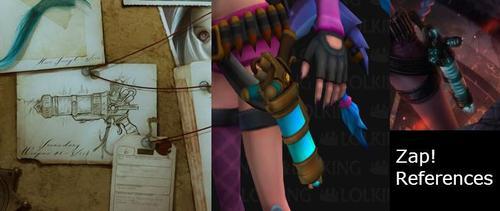
The very first challenge I encountered was deciding how I wanted Zap to look. The design of Zap varies wildly depending on what reference material you use, and it has such a peculiar shape that I ended up putting my version together from multiple sources. I wanted to stay pretty close to an official design, so I used the teaser sketch as the base with some further guidance from the 3D model and official splash art.
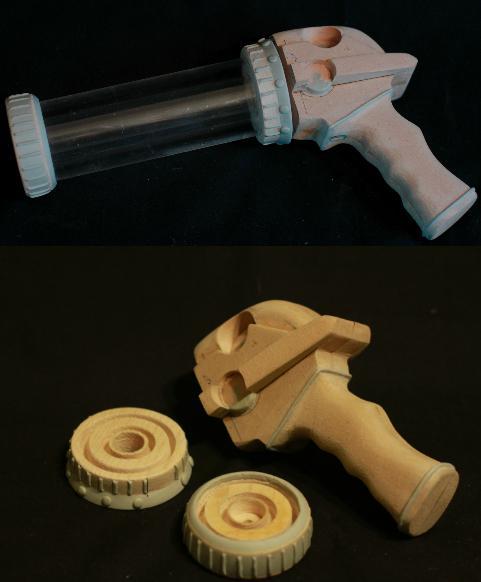
From the get go, I knew that I wanted to light this baby up, but power and wire housing in a tight space with good durability would be difficult, so I decided to try my hand at molding and casting. I broke up the gun into four main pieces to be molded. They would all be cast out of resin, but the butt of the gun would be slush cast so that it would be hollow for wiring and battery housing. After asking around for advice on how to create the master pieces for the mold and drafting a mock up out of card board, I started creating my masters out of 3/4” thick MDF board.
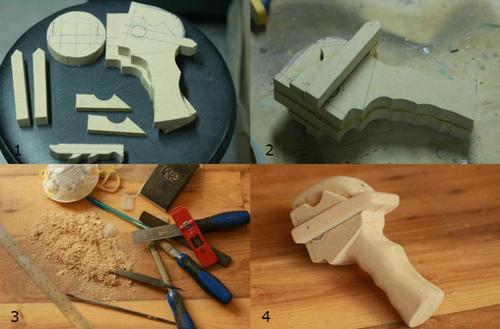
I cut the initial shapes with a jig saw and scroll saw, then glued the pieces for the butt of the gun together. The initial shape looked really rough, but with some time and patience, I was able to shape the MDF with rasps, files, and sand paper. As much as MDF is a great material, it still has some drawbacks. Since it’s basically compressed sawdust and glue, small pieces will break off easily and it gets fuzzy when sanded. The fuzziness, at least, can be corrected later on in the build with layers of paint primer and further sanding.
With some help from Mario Roy of Arms, Armor and Awesome, we used a drill press to create the slots for the two “ear” vials, marked out the spots for the side buttons, and drilled the slots in the barrel plugs for the three acrylic tubes that would make up the barrel.
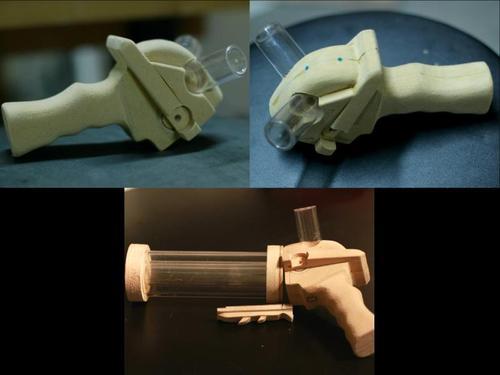
With all of the basic shapes roughed out pretty well, it was time to go in with Apoxie Sculpt to create the details on the masters. I made a time lapse video of the sculpting:
Apoxie Sculpt is a two part sculpting resin that is mixed at a 1:1 ratio. It behaves a lot like clay, you can use water on your fingers to smooth it out, it won’t crack as it hardens, and it holds detail really nicely. There is a two hour working time before the resin starts to really harden, but once hard it sands down beautifully.
After priming and doing a few more passes with some finer grit sand paper, it was time to create the silicone molds! I used Smooth-On’s Oomoo 25 silicone rubber for these molds. It’s a 1:1 ratio by volume silicone. It works beautifully for box molds and pulls detail really well. Once again, Mario was such a huge help and amazing teacher as he walked me through the steps of creating a one and two part box mold. One very important thing to remember when creating a silicone mold is to make sure that your master and clay are sulfur free. We used Plasteline clay, an oil based, sulfur free clay.
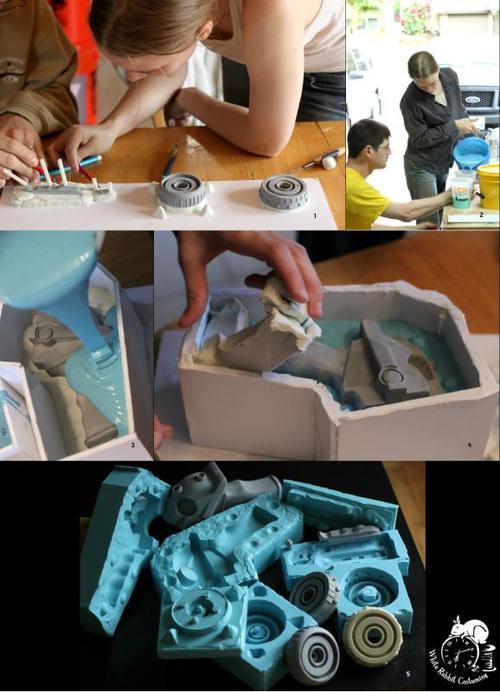
Step 1: Create your clay wall for your seam line. If you will be creating a two part mold, remember to add in your keys (rises and indents that will help your mold fit together later). As you decide where to create your seam line, make sure that you minimize any under cuts as they can be prone to bubbles and can lock your mold so it can’t open, which is never fun. You may also want to coat your master in mold release once the clay wall is built up to help the de-molding process later on.
Step 2: Build the outer walls of your box. Foam board and hot glue are inexpensive and super easy to use for a small box mold.
Step 3: Measure and mix your silicone. You really want to make sure that your silicone is well mixed. To minimize bubbles forming right against your master, start pouring slowly in a spot on the clay away from your master. The leading edge will degas itself as it flows over your master and the silicone itself will self-level itself pretty well.
Step 4: Once the silicone has cured, for a one part mold, you are pretty much done and you can remove the clay and de-mold your master. For a two part mold, without moving the master, you will want to flip everything over. You will most likely be able to re-use the foam core walls of your box and just shift the silicone and master down and remove the clay. At this time you want to coat the silicone and master really well in mold release. Silicone will stick to itself and you want to make sure that you don’t trap your master inside your mold!
Step 5: Mix and pour the silicone for the second part to your mold. Once it’s cured you can de-mold your master and your mold is ready to go! For my slush cast mold, I cut out some plywood and got a couple of straps for the two big sides to help keep the mold together without deforming during casting.
With the molds done, I ended up having to experiment with casting, making sure to minimize the chance of air bubbles and such. For the solid pieces, I used Smooth-Cast 300, which is a fast curing, low viscosity resin. For the butt of the gun I used Smooth-Cast 65D rotocasting/slush casting resin since I needed to do a slush cast. The 65D is designed so that it cures slower and changes from higher to lower viscosity as it starts to harden.
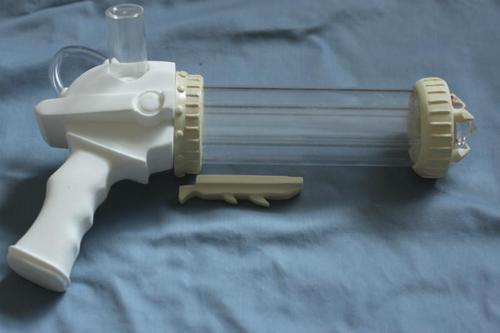
Whenever you cast something, you will almost always have some cleanup work to do. I ended up having to widen and drill holes for wires and sand the pieces down a bit more along the seam lines. Some of the trickier pieces, especially the small hooks for the end crystal, needed some filling for some residual air bubbles. Once cleanup was done, though, the gun started to really come together!
Next up was lights! Diego “Diegator” Valdez, a fellow artist with better tech-karma than me, helped me out with wiring the lights together and wow does this baby glow! We ended up using seven tiny white LED lights for this prop. I was able to tint the light closer to a teal-blue with a bit of nail polish over the LED. To help distribute the glow, I sanded clear elements that were closest to the lights. We found we also had to add in a smaller acrylic pipe inside the vial “ears” to help with this.

At this point, it was time to address the other miscellaneous parts of the gun that needed to be fabricated and modified.

Top Left: I found that even though sanding the inner pipes helped some for distributing the light glow, it would look odd when the lights weren’t on, so I used the same teal nail polish to paint a thin layer of tint on each of the innermost pipe pieces.
Top Right: I needed some form of access to the butt of the gun to change batteries, so I added in a tiny hinge and hook to the bottom part of the gun.
Bottom Left: The caging around the vial “ears” would be too obnoxious to mold and cast, so I just did a sculpt over the outer vial with Apoxie Sculpt when it was time.
Bottom Right: The center coil needed to be made! I took 1/8” thick acrylic rod and used a heat gun to form it into a spiral around the middle barrel pipe. I did the same thing to create the half loop tube for the top of the butt of the gun, and threaded that through some flexible clear vinyl tubing to maintain a consistent look for all of the tubes of the gun. These pieces were also sanded and tinted with teal nail polish before installation.
With all this done, it was about time for paint!
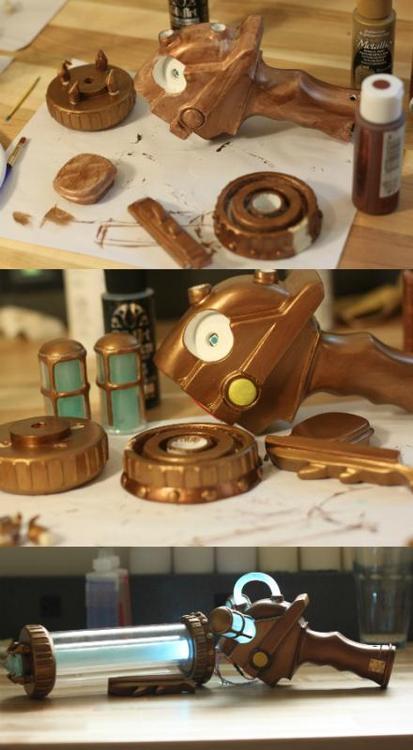
I used metallic acrylic paints for this project, mostly a mix of different bronzes and golds, to build up the color and maintain some level of color separation and differentiation. Once the paint was done, I glued everything together with 5 Minute Epoxy. For final details, I added on some leather straps in around the barrel and grip and added in some rivet studs to complete the final look!
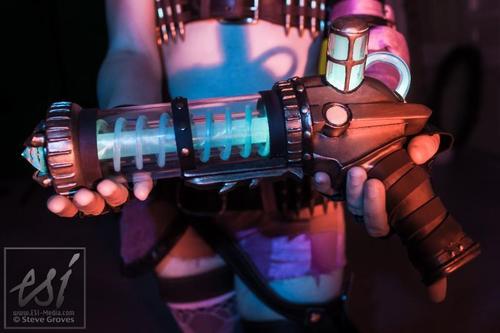
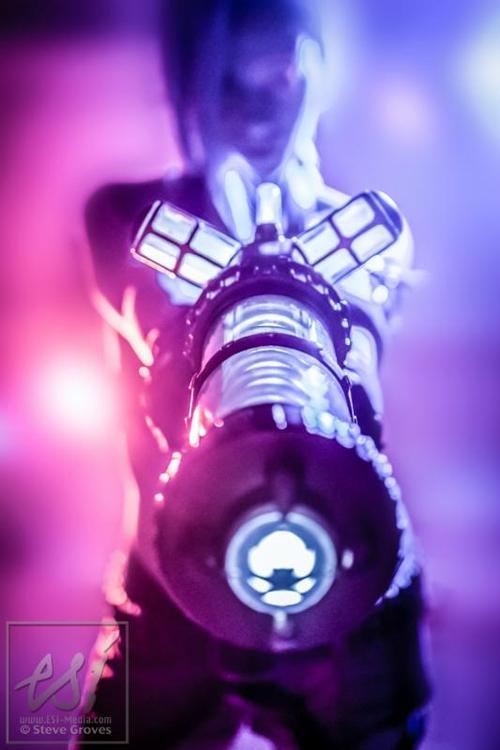
And with that, Zap was finally finished! Stay tuned for WIP articles for PowPow and Fishbones!
I hope this helps to answer any questions and if you have more, feel free to ask!
In the meantime, where was I…? Oh right. Wreaking havoc!!! ^_^