Since the reveal of League of Legends’ most recent champion, Jinx, about a month ago, I’ve been working on bringing her to life. So far, I have been able to finish everything except for the guns. A few people have asked me about how I made her costume pieces, so here’s a quick overview of some of my work in progress.
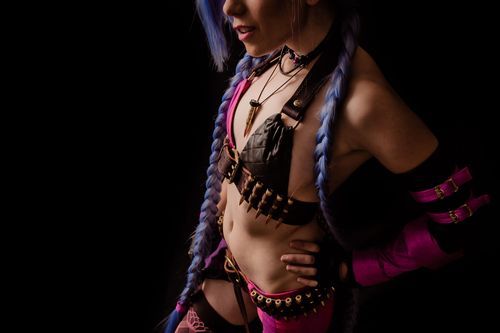
I started working on the top and shorts first. I used two different pink fabrics (silk rayon and denim) to create 1” stripes. Once the squares of striped fabric were completed, I used those pieces to create the right breast cover and shorts. I did not hem the bottom of the shorts and frayed the edges of the fabrics a bit to make them seem like rough, tough cut offs, but sealed the edges with fray check to make sure they wouldn’t fray further. I quilted lambskin to a lining for the left breast cover.
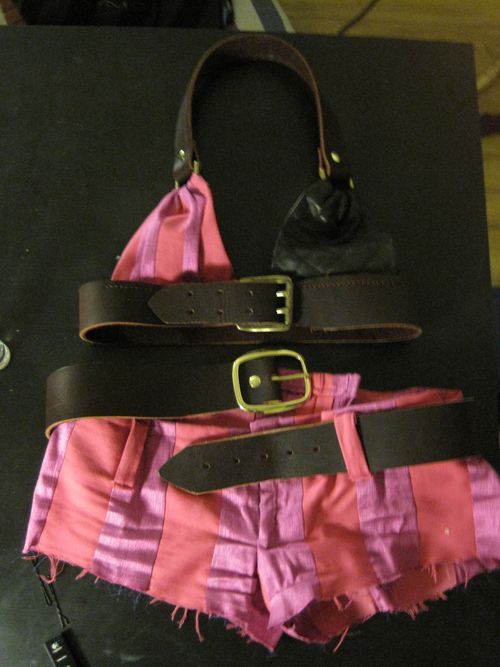
The next big thing I worked on was creating the belts and straps. I purchased some beautiful belt leather from the Tandy Leather Factory, with different widths depending on the belt I was looking to create. The widest was the belt around the waist and the thinnest was the neck strap and hip holster. After I secured the buckles/hardware with screw-in rivets and cut the leather to length, I hand stitched the decorative stitching along the edges of each strap, save for the straps that would become bandoliers later on.

The bandoliers are two 1/2” wide leather straps. The bullets are .308 caliber dummy bullets that I got from Dummy Bullet. There is no primer in the back, the casing is completely empty and a hole is drilled through the side of each of them, rendering them completely inert.
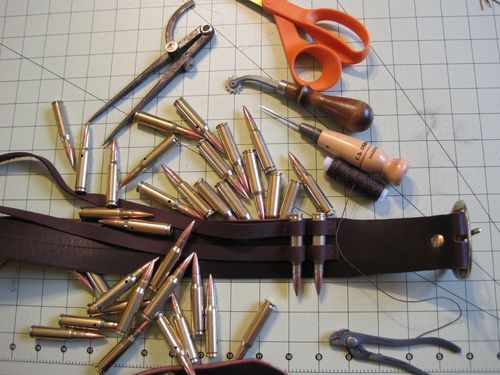
Here’s the end result of the bandoliers.

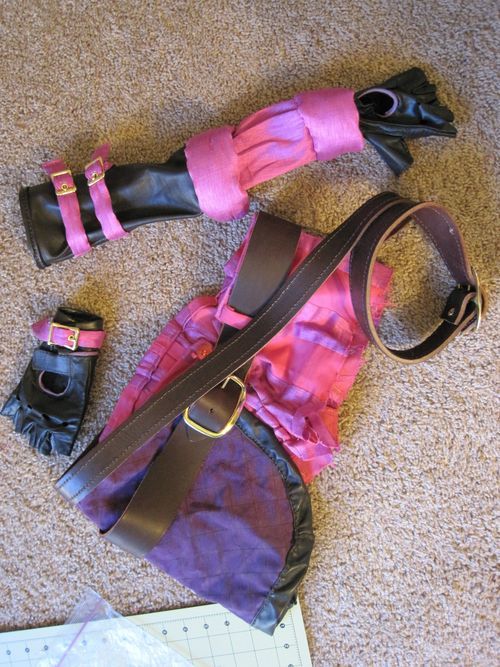
The next project was to create the purple hip cover. This part of the costume went through two renditions. I used a purple pigskin suede and quilted it to a back lining. The edging was lambskin (the same as I used in the top) and had to be hand stitched on. The top edge was then stitched to the bottom edge of the hip holster strap. The left arm sleeve was also created from the lambskin and the bottom pink portion was the same silk rayon used in the shorts. The two raised bands I made with some batting.
The wig started out as a slate blue Delilah from Arda Wigs and an order of short wefts. First I took aluminum wire and threaded it over the crown through the lace of the wig, and made it long enough that it would extend partially down through the braids to give the braids some initial shape. Then I had to criss-cross the part down the back of the wig so that the base of the wefts wouldn’t show through.
Once this was done, I started working on a custom hairline for the wig with some of the hair from the weft I had bought so that the wig would become a lace front. I used ventilation, which is a technique where you tie hairs onto a fine netting with a small hook tool, onto film quality mesh.

Once the hairline was ventilated, I sewed it to the wig and started styling the wig with a hair dryer along each weft so that the hair would be pulled straight back. I added in some extra wefts parallel to those already present to add more thickness, help cover the aluminum wire, and give me more to work with later on for the side bang fwoop.
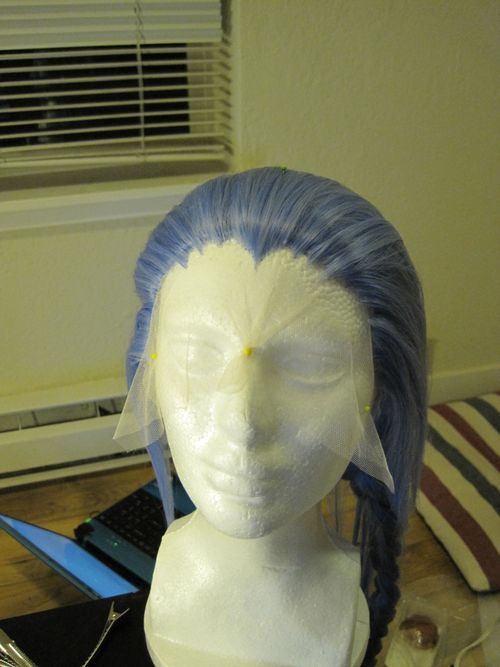
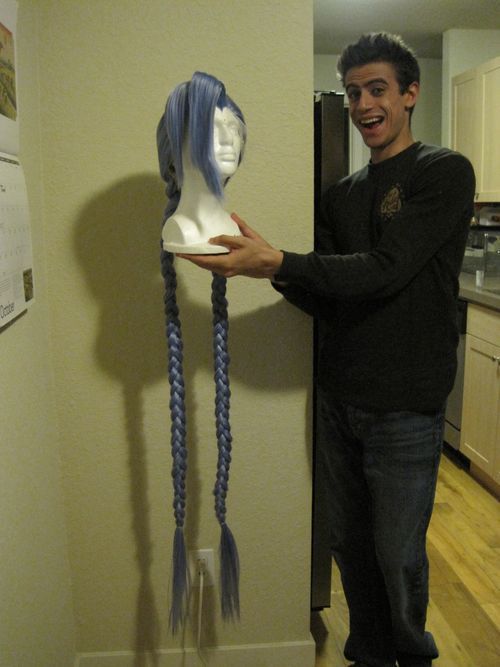
Before I started styling the side bangs, I added in a bunch of wefts perpendicular to the ones already present in the general area of the fwoop so that I had more and longer hair to work with. After that, I separated the hair I would use for the outermost layers and teased the inside layers of hair until it created the general height and shape I wanted the fwoop to be. It looked really messy, but once that was done, I covered the mess with the outer layers of hair and styled them into place with hair spray and a hair dryer. Finally, I trimmed and styled the hair into place, redid the two braids, added some wefts around the ties at the ends of the braids, and added wig clips on the underside of the wig to help keep it forward and in place when I wore it.
Here’s a picture of the final wig with Tenarius doing his best Jinx face:
Here’s a shot of the back where you can see the criss crossed part:

There are some odds and ends that I worked on as well. The stockings are actually two different pairs, one fishnet and one regular, that I wear one over the other. When I got them, the pink was too bright and the purple too dark, so I used some RIT dye remover to tone down the colors a bit. The necklace was also a fun little project; I played with different cord and textures and tried my hand at a Turk’s head knot to hold the bullet.

So that’s pretty much everything I’ve done so far for Jinx! I am still working on figuring out how to do the guns, which will be another huge, fun project! Stay tuned for more progress and epic photos!
I hope this helps to answer any questions and if you have more, feel free to ask!
In the meantime, GET JINXED! 😀
