I talked about some of the reasons and thought process behind my design of my Janna costume in Part 1 of this article series and now it’s time to discuss construction! Here goes!
As mentioned in Part 1, I created all of the armor pieces out of a mix of Wonderflex, Worbla, and Friendly Plastic. I decided to mix them so that I could maximize the strengths of each material for each specific piece. Since they will all adhere to each other easily, integrating them made sense. I didn’t use a foam core between my layers, partly because I wanted them to be on the thinner side for a more delicate and organic feel and partly because I was lazy. 😛 I used Wonderflex as the base of most of the armor pieces because the fabric mesh on the back makes it stronger than Worbla.
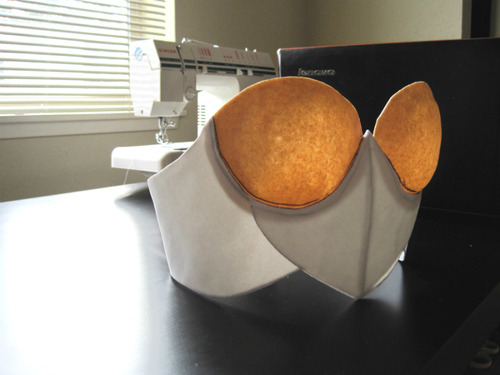
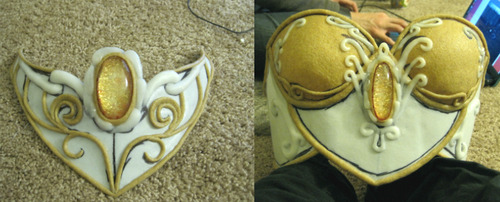
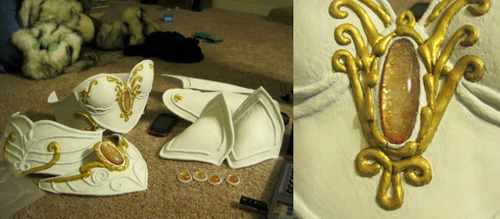
Worbla, on the other hand (since it has no fabric mesh on the back) is able to create compound curves and can be easily mushed together to sculpt into raised detailing, so I decided to use it for compound curves of the breast and hip pieces and for the raised details that would later be painted white.

The armor pieces were looking really great, but I wanted the gold details to be really smooth and organic looking. Now, it’s awesome that Worbla can be sculpted, but it still retains a grainy texture that’s really annoying to get rid of and I really wanted the gold detailing to be a different texture and super smooth in comparison to the rest of the armor. Hence, Friendly Plastic was my material of choice for all of the gold detailing.
Friendly Plastic starts out as a bunch of little round beads that can then be melted and shaped easily with a heat gun. I’ve also been able to melt the plastic in boiling water, but I find that it is hotter for my fingers that way and I lose working time because I end up burning my fingers more often. I usually melt the beads with a heat gun in a small ceramic corning-ware dish and pull off globs and reheat it as I need it.
Useful tip: Dip your fingers in water as you work with Friendly Plastic. With the water, it won’t stick to your fingers and you can rub it really smooth so that you won’t leave any fingerprint wrinkles. For fine details, wait for the plastic to harden a little bit and then dip a toothpick in water and use it to shape the plastic.
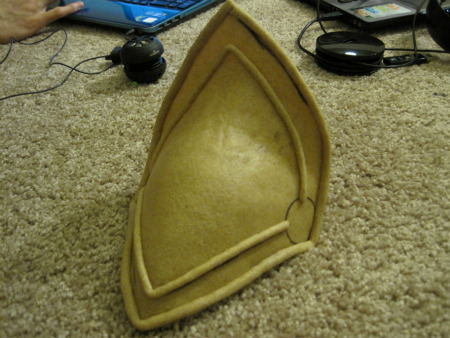
The last step was priming and painting. I used several layers of gesso and sanded it to prime the armor pieces and I found that I had to use additional layers on the Worbla pieces to compensate for its grainier texture.
Useful tip: Never prime friendly plastic with gesso or any primer that requires sanding. It does not take sanding well at all and it’s already as smooth as it can be. If you accidentally get some gesso on it, wait for it to dry and then scrape it off. I found this out the hard way when I was priming and painting my Orianna costume.
Next came the painting! I used acrylic paints and added in some pearl paint to the white. Since the armor is supposed to be pristine and white, I decided to shade it with light shades of blue, as adding any black would make it look way to dingy and just plain white and solid gold would look a bit too flat.
With the last few details and fastenings of the armor pieces getting taken care of, I got to play with pretty fabric! As mentioned in Part 1, I decided to make the main skirt out of an embroidered organza and chiffon. I believe I gathered 5 yards of chiffon and 2-3 yards of organza together (I can’t remember exact numbers :P) for the main skirt and then gathered some long rectangles of chiffon for the four hip pieces.

I edged the organza with a satin ribbon folded over the hem. The main skirt chiffon was edged in a really pretty gold braid folded over the hem. The four hip pieces of chiffon were edged in the same kind of braid as the main skirt, but in white instead of gold. All of the edging was hand stitched in place.
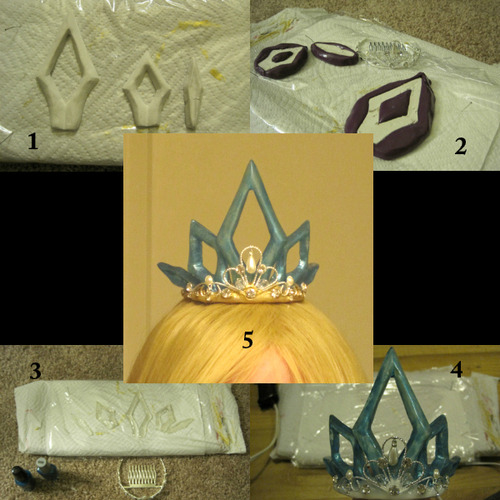
The crown and gem pieces were all sculpted and cast in clear resin. Here’s a quick photo collection of how the crown came together.
And now for the staff! This was actually a really fun project and I made a conscious effort to document my progress. My methods were almost identical to the time I made the ice pieces for my Sejuani costume, but the internal structure this time round was much sturdier. 😛
My base materials were three sections of PVC pipe with two connectors (so the staff could break down), plexiglass, clear plastic, and hot glue. To start I cut out the overall shape of the top of the staff with a dremel from plexiglass, and then cut two panes to go perpendicular to it to dictate maximum thickness. I had goggles and a dust mask because inhaling and getting plexiglass in the eye is no fun. Remember, safety first!

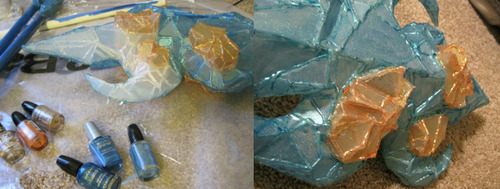
The plexiglass is held together with industrial strength acrylic glue designed for plexiglass and slotted into the top portion of the PVC pipe. From this point, I took some clear, fairly flexible plastic that was thin enough to cut with scissors (at the time, it was a dog collar cone that wasn’t as clear as I wanted, but I have since discovered the wonders of TAP Plastics!) and started to cut and glue on some vertical forms for the gold circles.
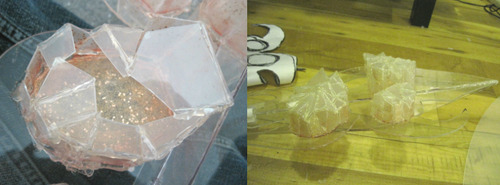
Before I closed the circles off over the top, I painted the inside with different colors of nail polish because I really wanted the golds and yellows to pop in the final product. Once this was done, I started puzzling together the rest of the staff.

I literally just eyeballed the pieces, patterning, gluing, and cutting as I went. It made for a nice organic feel and the process was really quite cathartic. Once one side was done, I repeated it the exact same way on the other side. This wasn’t the only “ice” work I did, though.
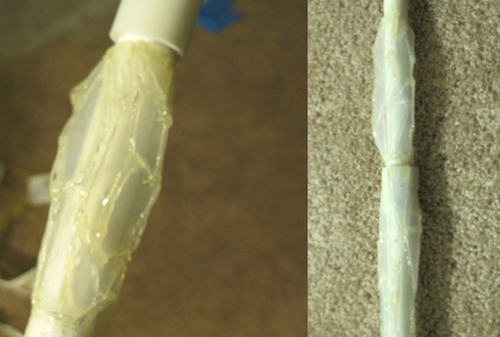
I had split the length of the staff into a total of three pieces for easy break down and transport and I didn’t like how the joins looked for the length of the staff, so I covered them over in ice build-up.
Now came the last step of painting everything! I wanted something rather translucent and sparkly (Yay sparkles!), so I went with nail polish…a lot of nail polish…but it’s ok because a lot of it was the inexpensive kind. 😛
When the painting was all done, I sealed it over with a clear acrylic spray and tada! The staff also looks really cool when light is shown through it!
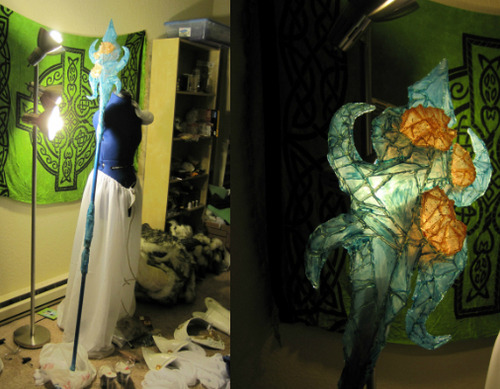
If I had more time, I would have added in lights to the inside of the staff, but alas, time constraints. 🙁
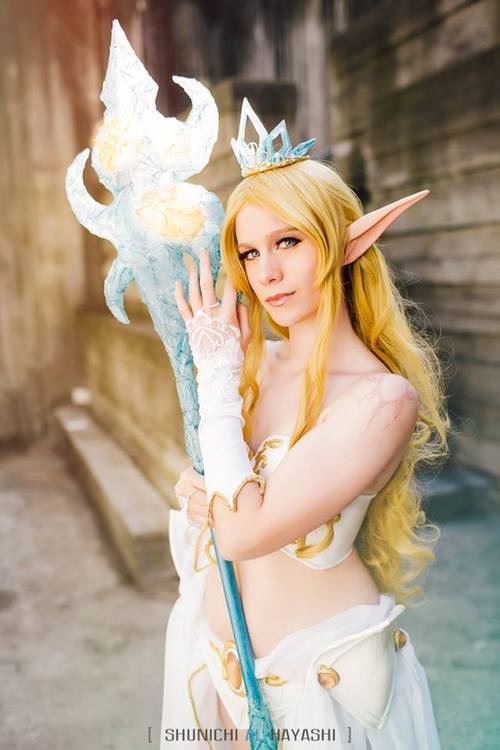
The last portions of the costume were mostly put together. I bought 6” clear platform heels to create the illusion of floating while on the con floor. The ears were bought from Adriani Costumes and I bought the gloves and modified the top edge. Lastly, some henna for the shoulder tattoos.
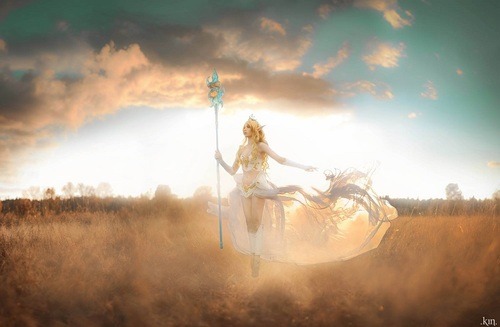
And with all of this and some collaboration with some amazing friends and photographers, some beautiful art was made. Thank you all so much for reading! I hope this helps and if you have any further questions, feel free to ask! ^_^